
A comprehensive Python toolkit for camera calibration using OpenCV. This project provides tools to calibrate your camera, remove lens distortion, and apply the calibration to live video feeds.
Camera calibration is the process of estimating the parameters of a camera's lens and image sensor. These parameters can be used to correct for lens distortion, measure the size of an object in world units, or determine the location of the camera in the scene.
This toolkit includes:
- Image Capture Tool: Capture calibration images from your camera
- Calibration Tool: Process the calibration images to compute camera parameters
- Live Undistortion: Apply the calibration to a live video feed
- Python 3.6+
- OpenCV 4.5+
- NumPy 1.20+
- Matplotlib 3.4+ (for visualization)
Install the required packages:
pip install -r requirements.txtThis section describes how to calibrate a VR headset camera using this toolkit. The process involves capturing calibration images, generating a calibration profile, and creating a distortion profile for the headset.
There are some examples of it's usage at https://github.com/sboys3/CustomHeadsetOpenVR/wiki/Micro-OLED-Comparison
 |
 |
 |
- A wide-angle camera
- A VR headset capable of displaying the calibration pattern
- The calibration checkerboard pattern (print
board.svgor display digitally) - Access to the shader files for displaying the pattern on your VR headset
- You will want a fish eye camera with at least 140 or 150 degrees of diagonal FOV
- The camera does not need to be expensive. The camera I used initially was around $20.
- It needs to be a USB camera so that it can run int realtime and interface with OpenCV
- The form factor needs to be able to get close to the lens.
- Print or display the checkerboard pattern (
board.svg) - Run the image capture script:
python capture_calibration_images.py - Capture multiple images of the checkerboard from different angles and positions
- Press
cto capture each image,qto quit - Run the calibration script to process the captured images:
python camera_calibration.py - This will generate a calibration profile saved in the
outputdirectory
- Run the live undistortion script:
python live_undistortion.py - This displays the undistorted camera feed with calibration markers overlaid
- The calibration pattern needs to be displayed on your VR headset
- Shader files for displaying the pattern are included in this repository
- Apply these shaders to your VR headset or if you have my VRC avatar, you can use the test pattern on it
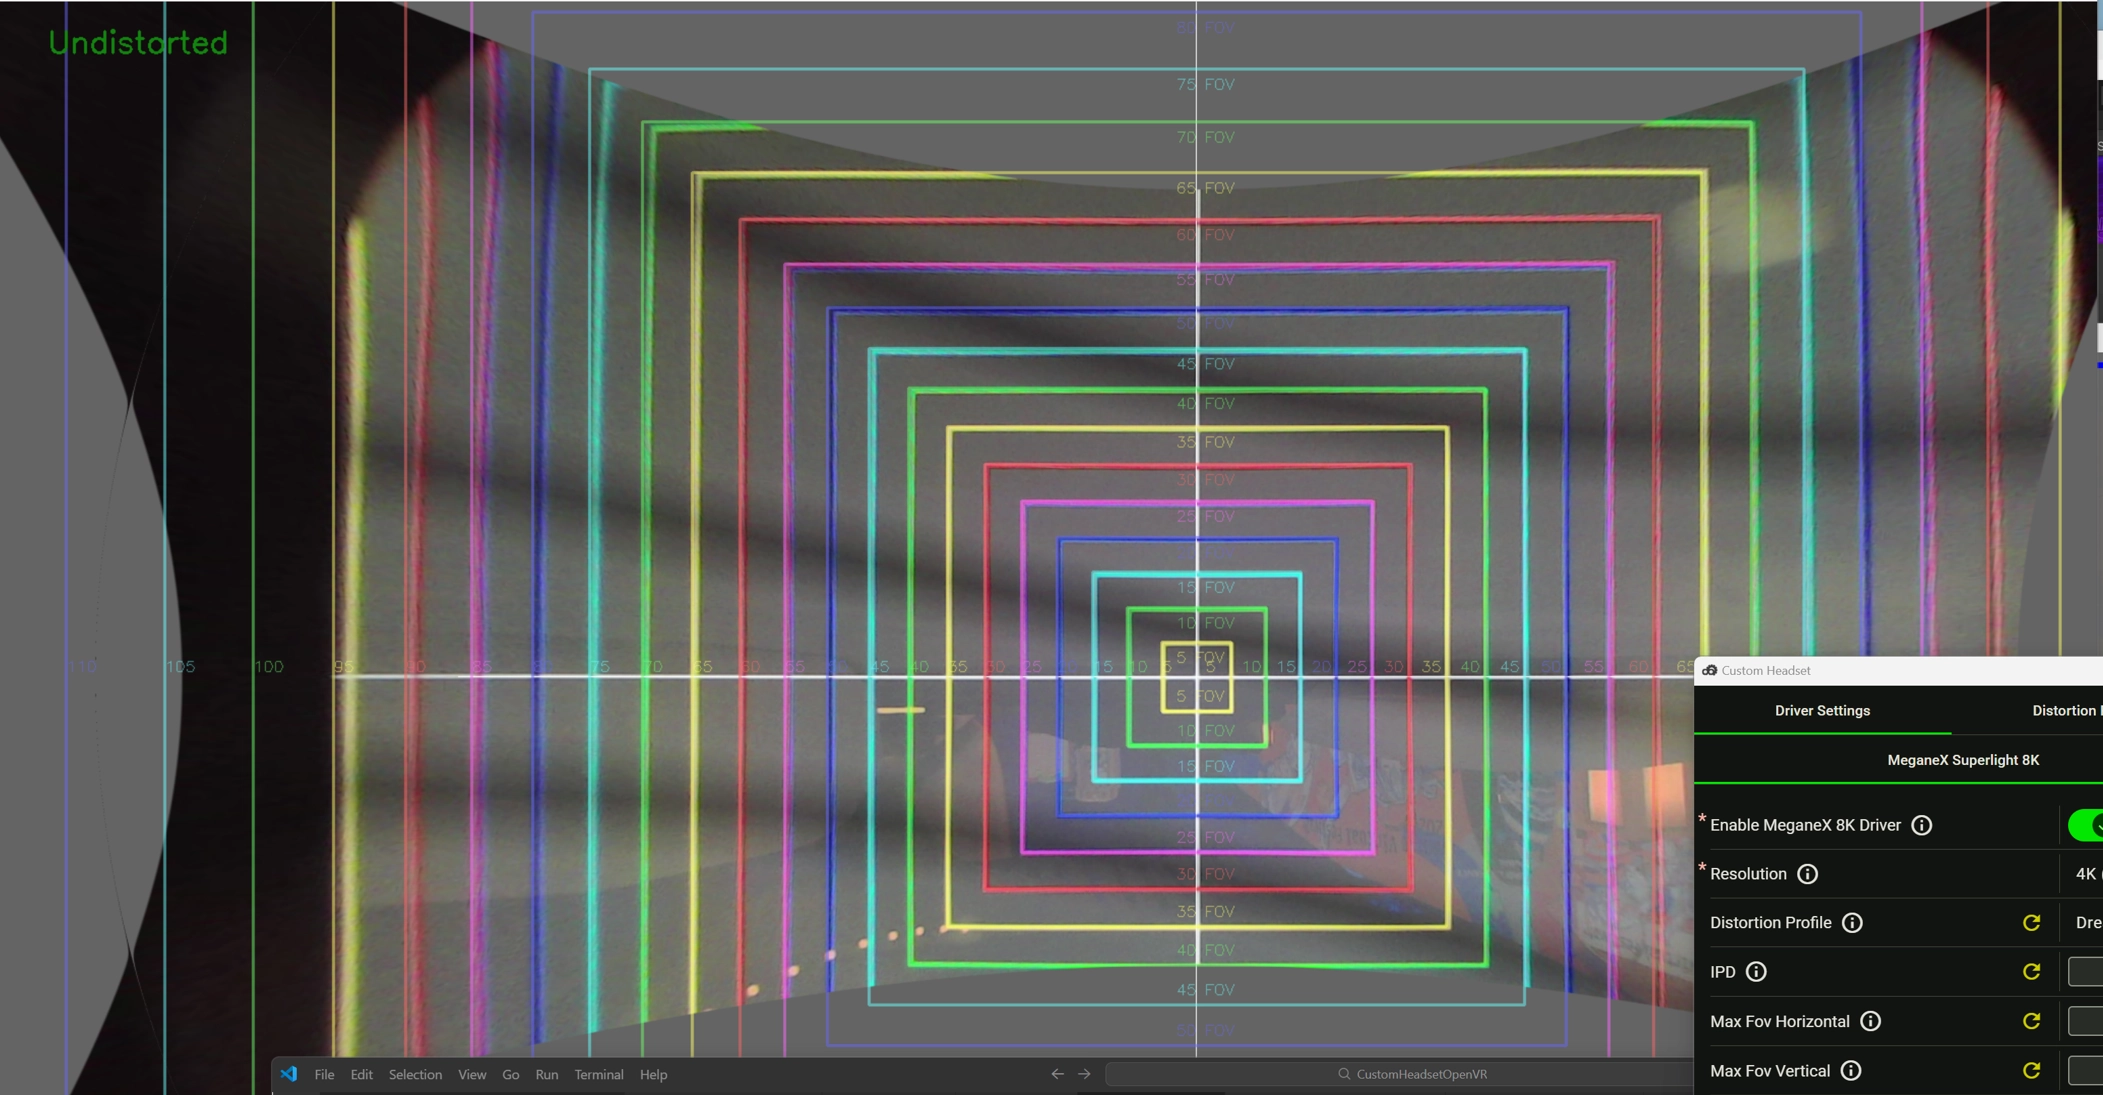
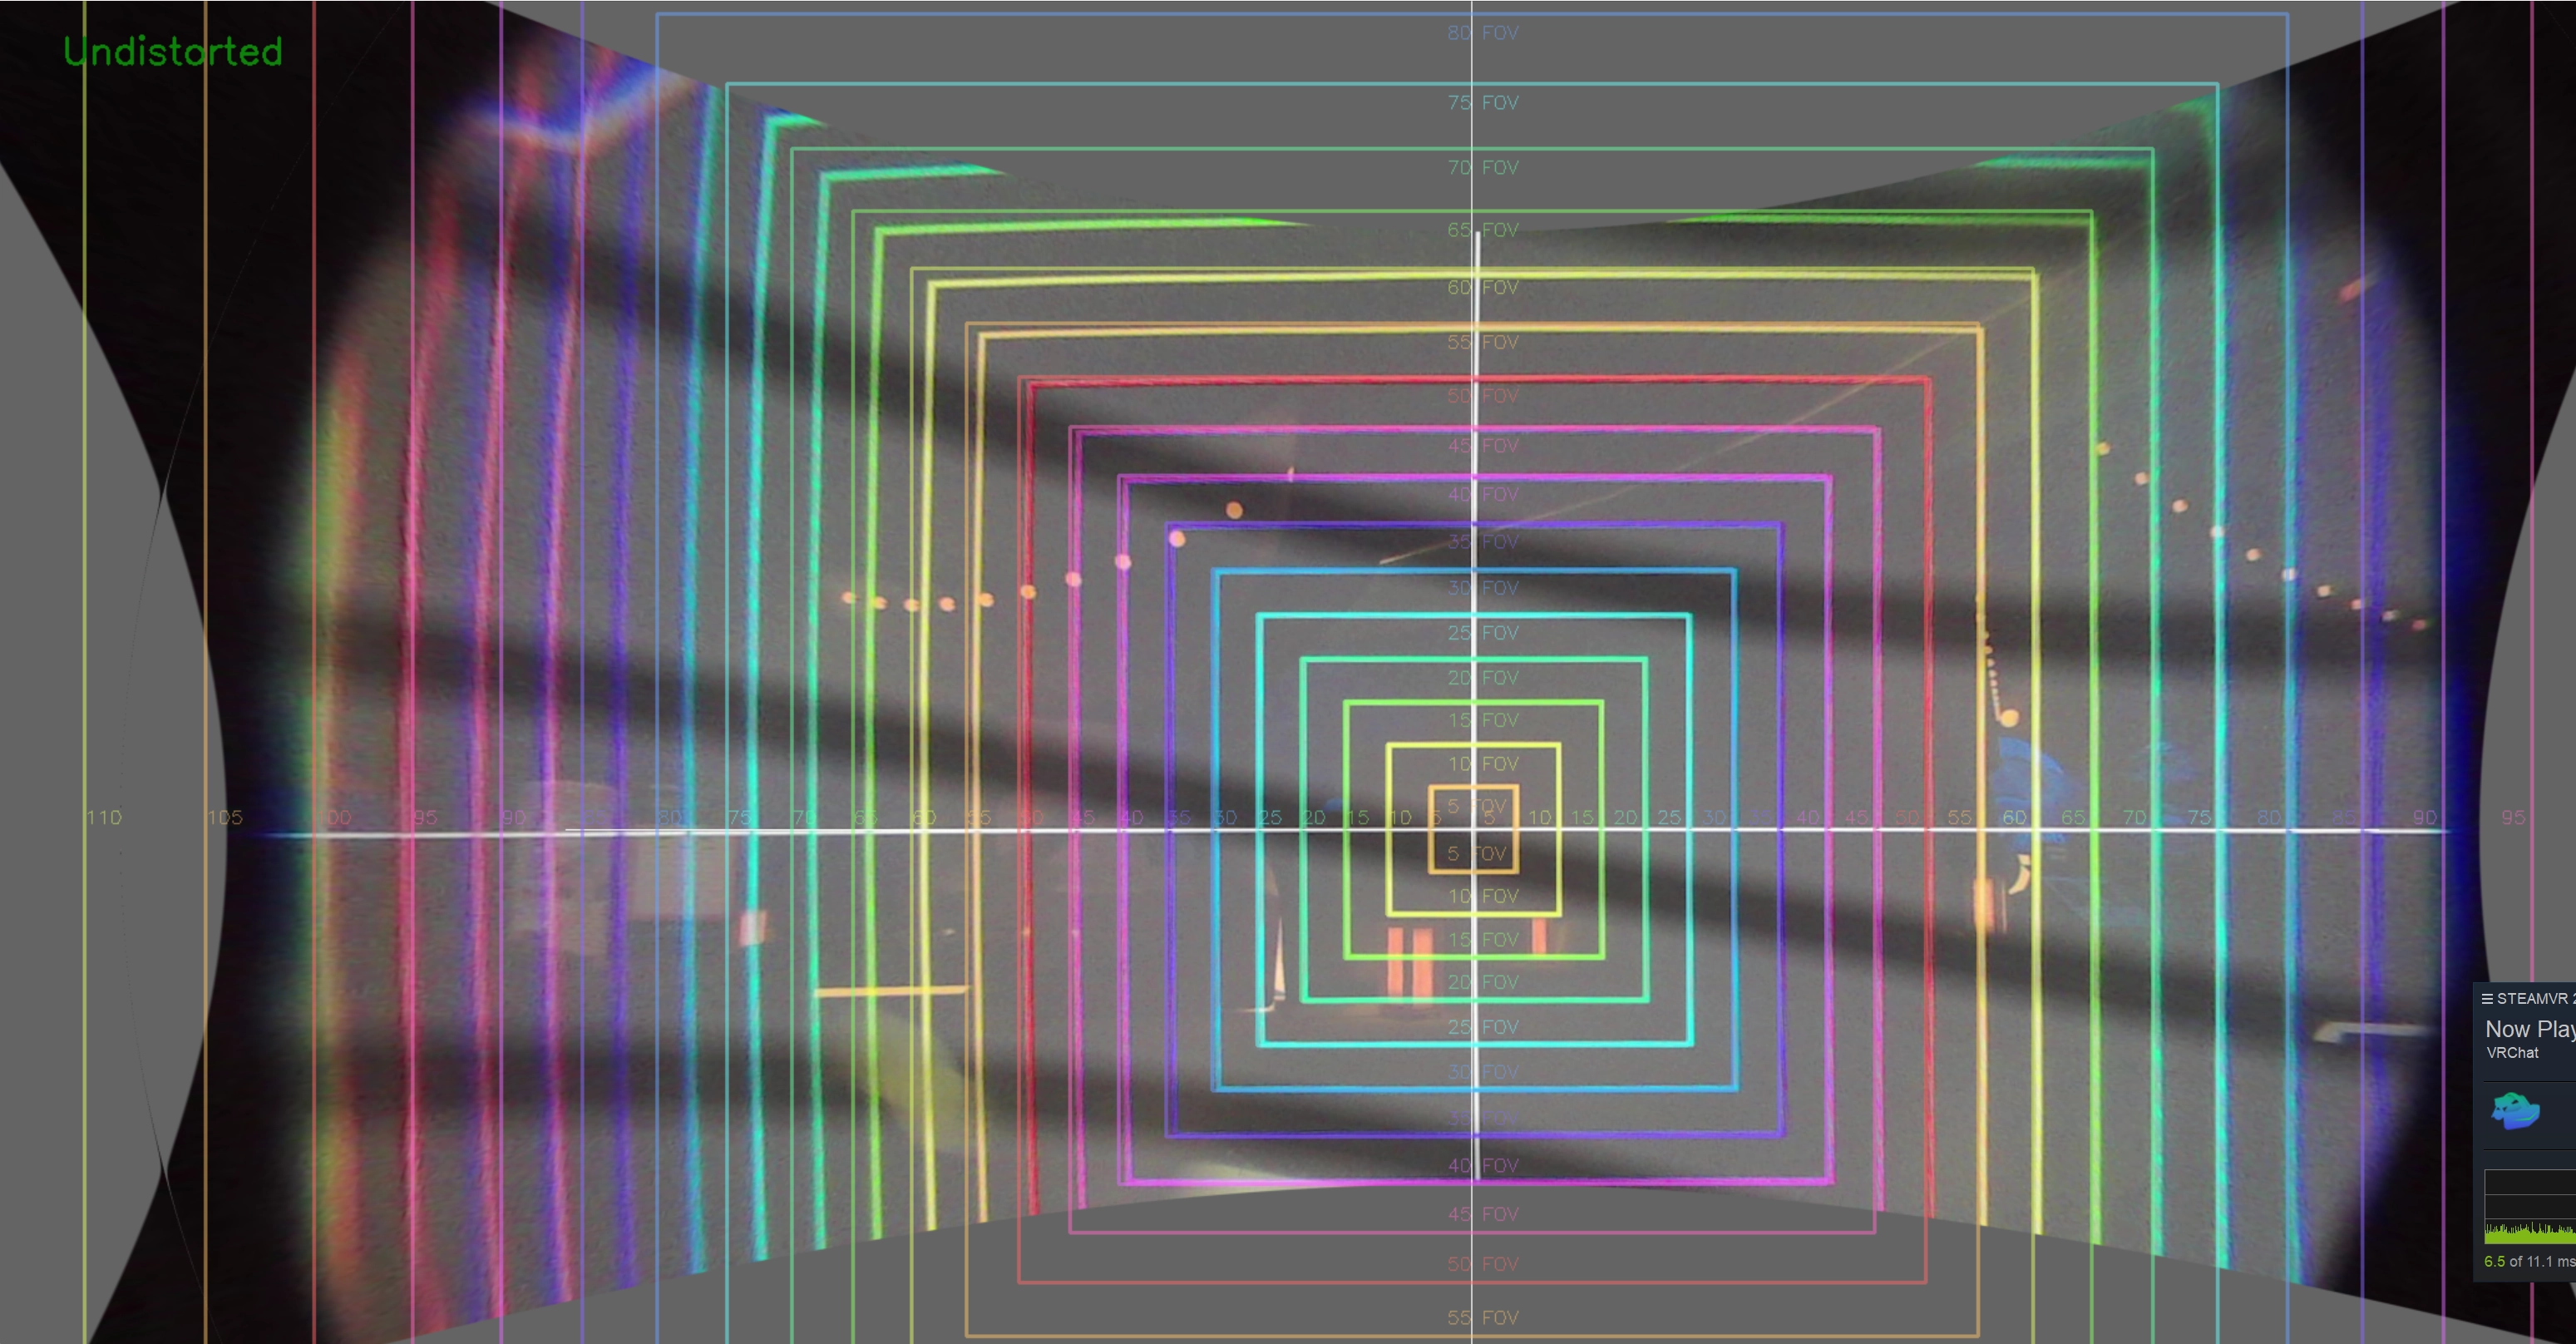
These diagrams show the FOV and distortion by using a calibrated camera to look through the lens. The thin lines that extend outside the camera are the ground truth overlaid over the calibrated photo while the thicker blurry lines are rendered on the display of the headset. The ground truth boxes have the FOV that they cover from edge to edge listed. Each line is 2.5 degrees apart from its neighbors. The solid gray portions on the edges are outside of what the camera can see.
- Hold the camera up to the VR headset
- Position the white markers visible in the live undistortion view
- Adjust until the markers align with the pattern displayed on the headset
Start with a few points and then work your way up to evenly spaced points every 5 degrees.
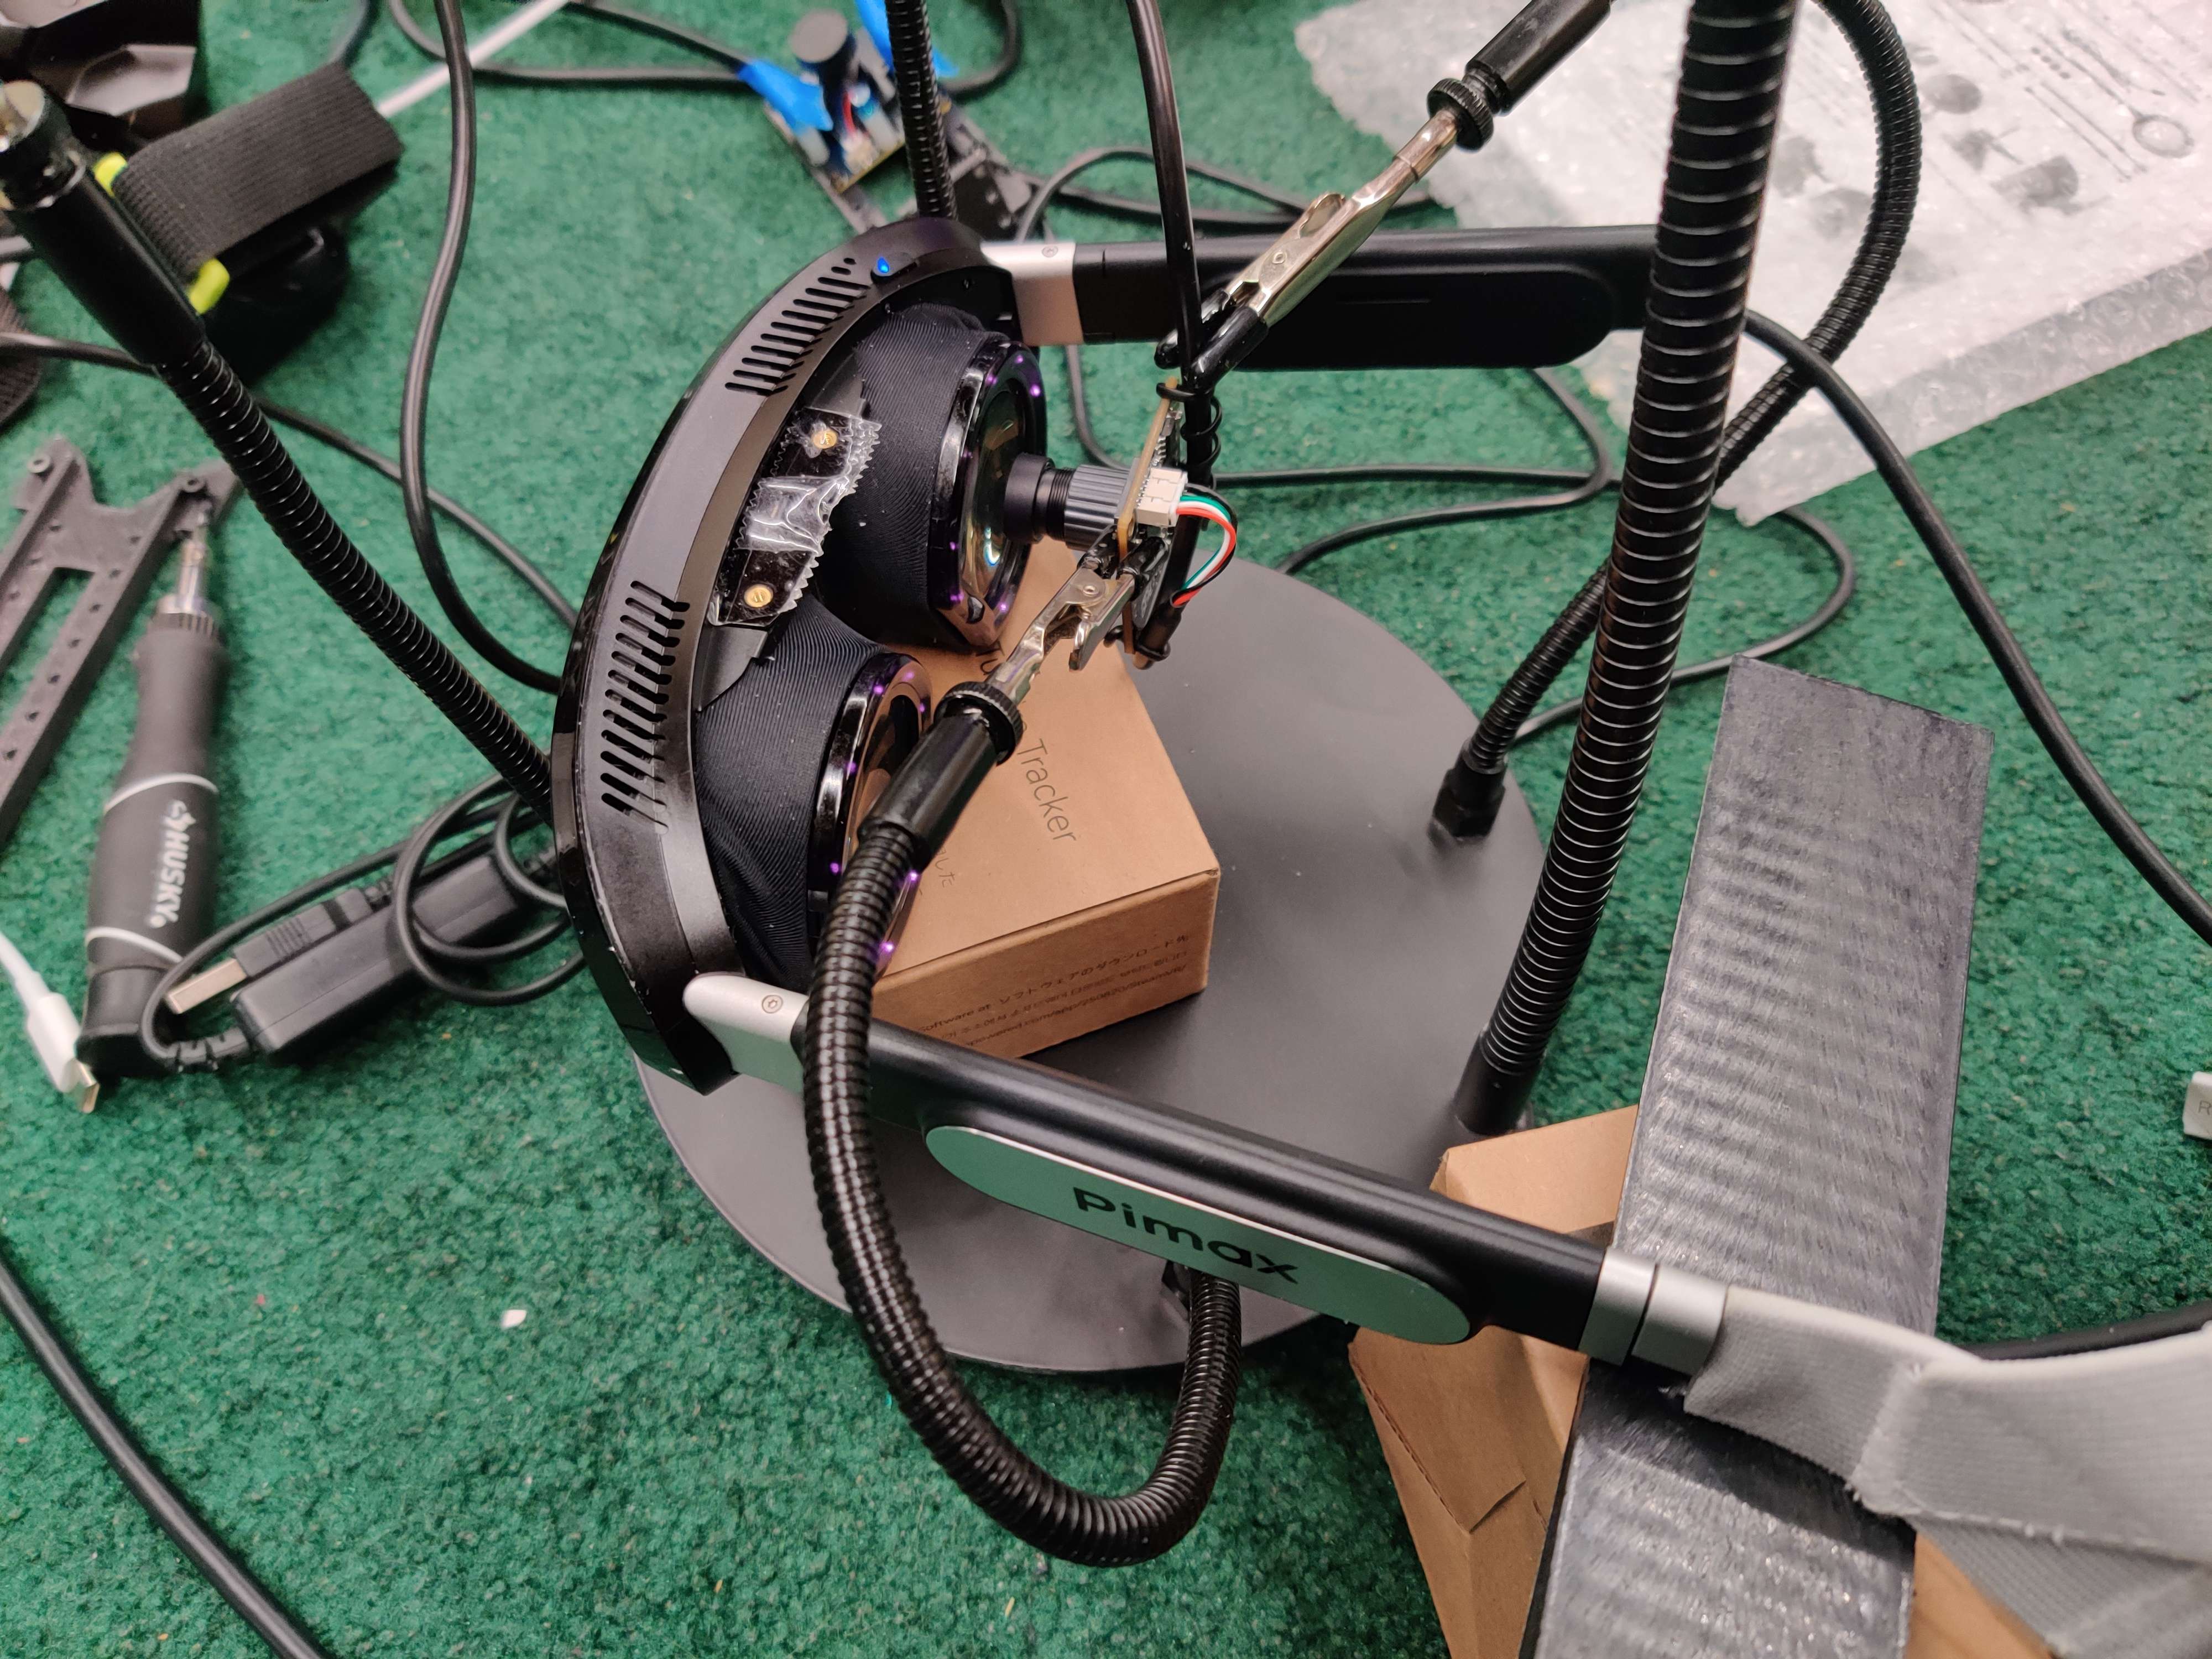
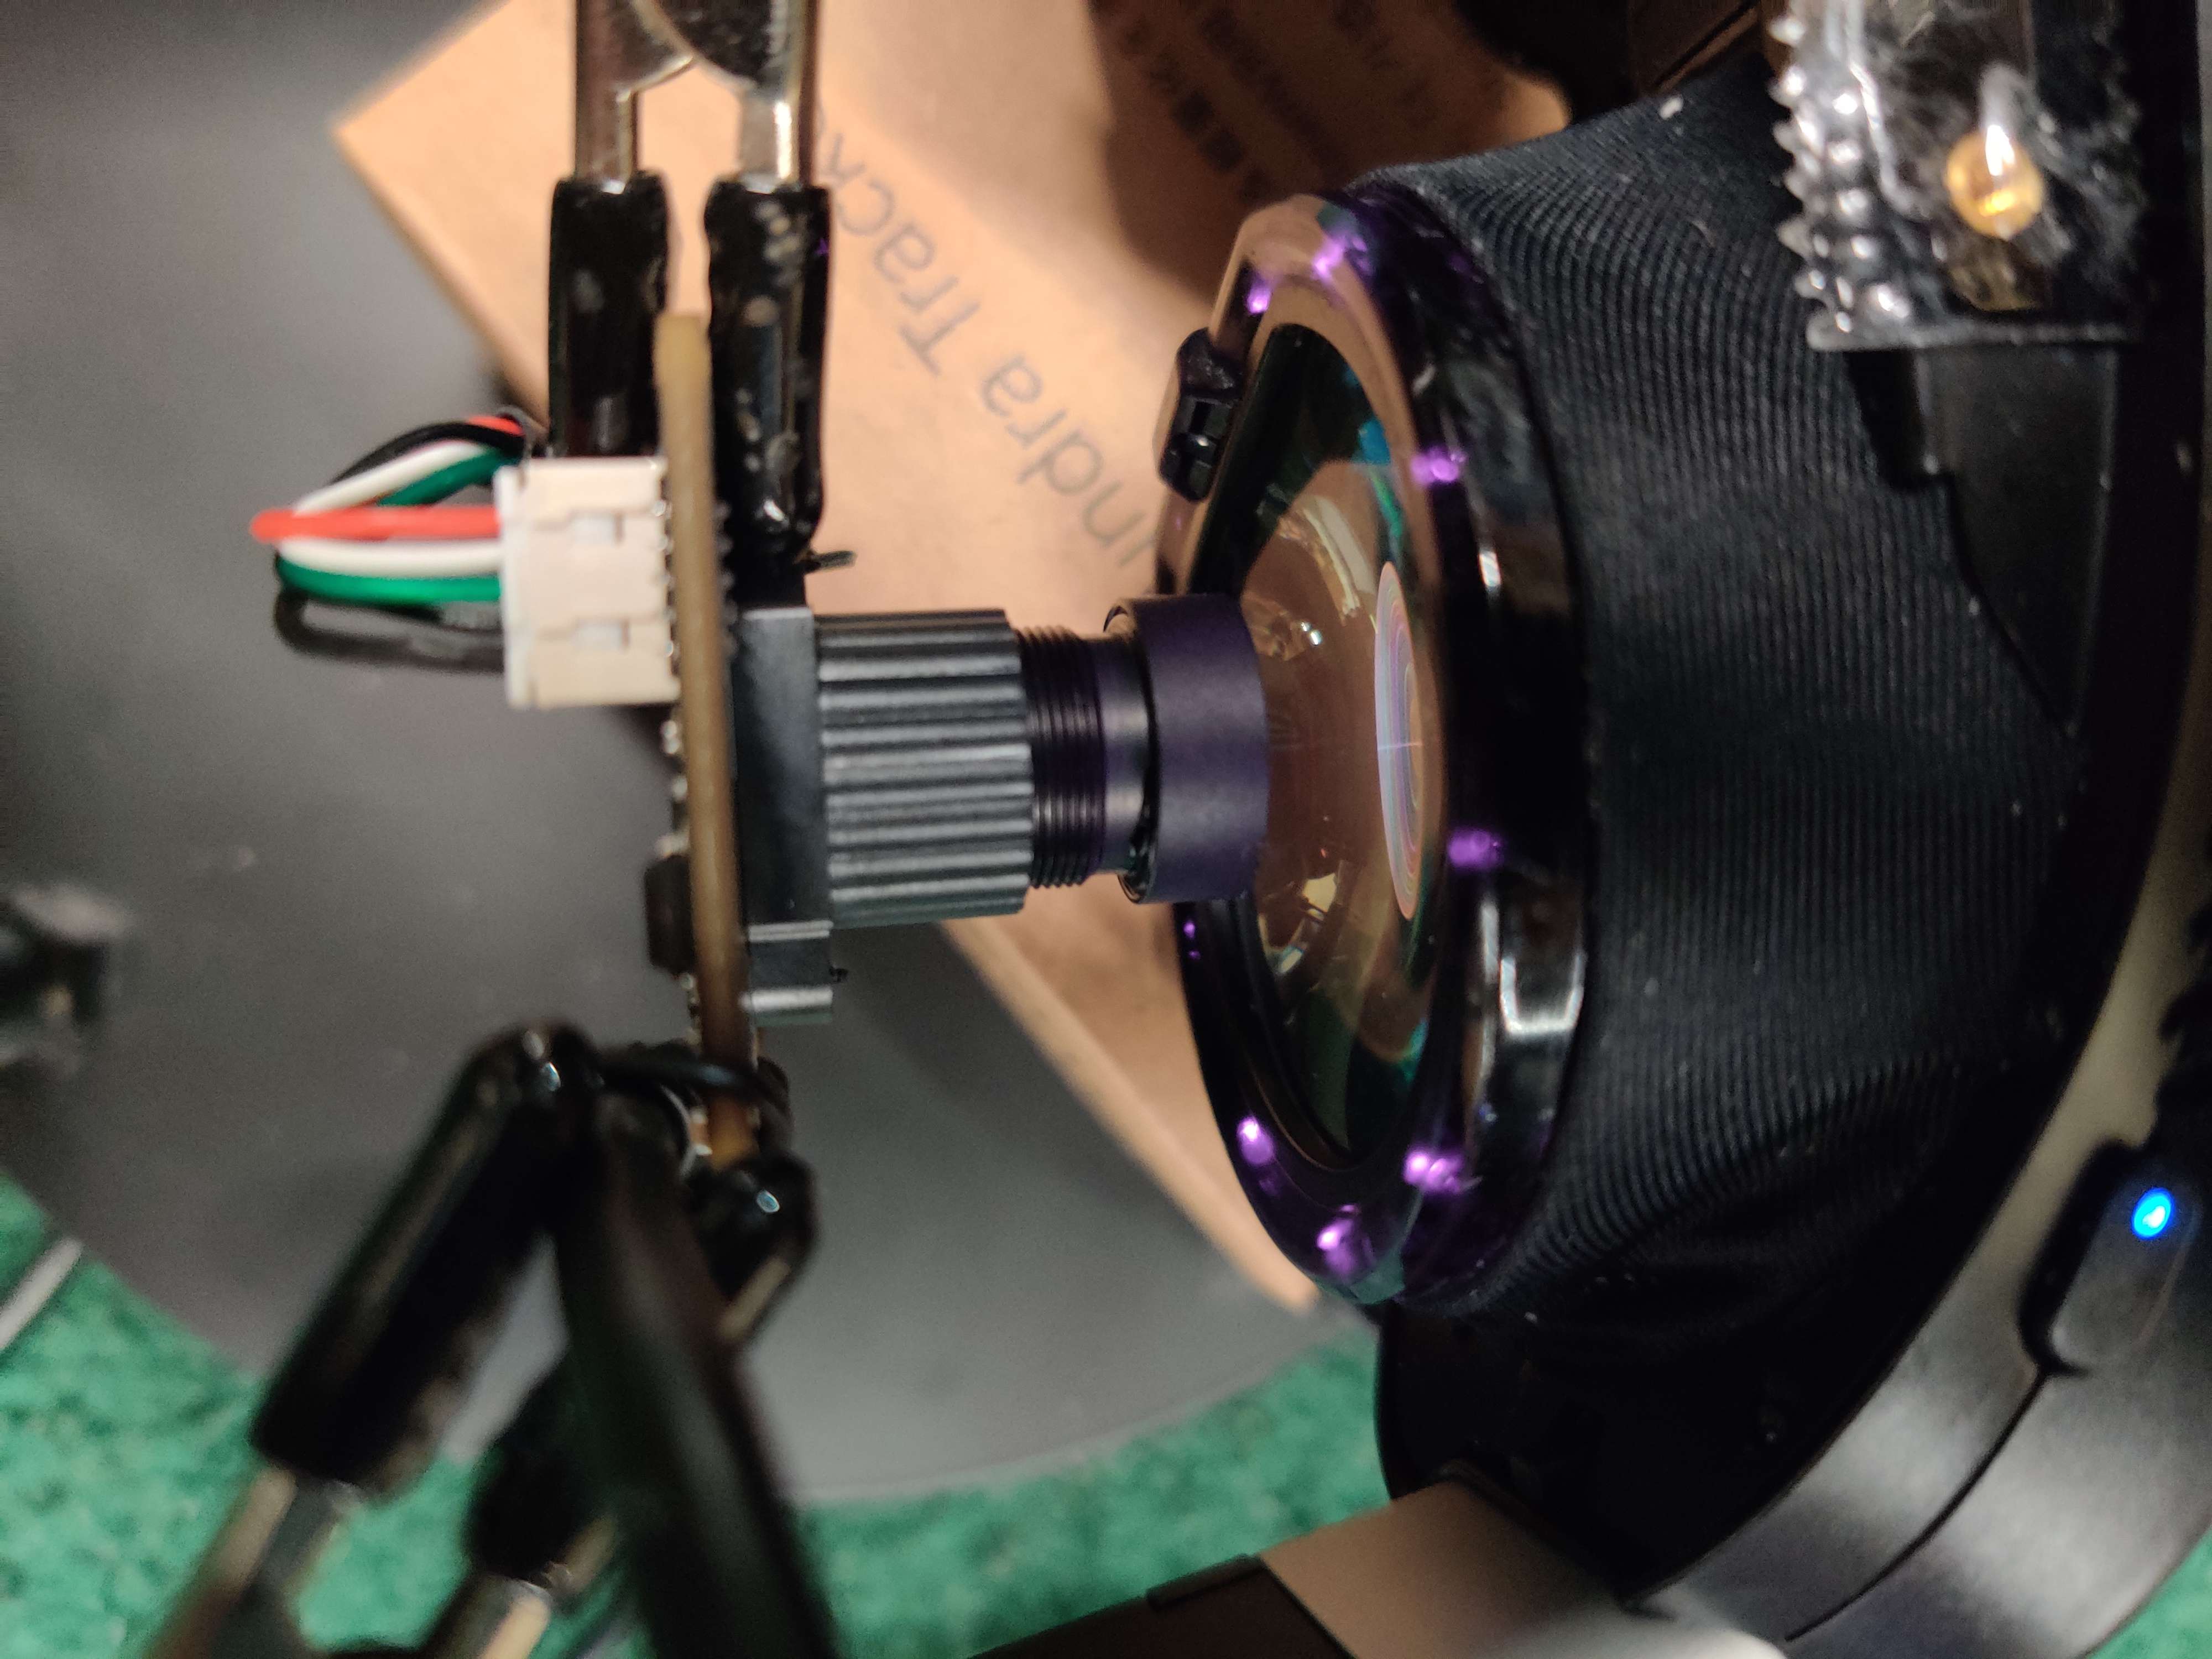
- Mount the camera in front of the headset lens and align it (you will need to find a suitable mounting solution)
- Check the how the patterns line up
- Modify the distortion profile iteratively
- Adjust until all markers and patterns line up perfectly
- Smooth out the derivatives using line-smooth.html
- Go back to step 2 and check that it still aligns if you made any modifications an repeat until it lines up and has smooth derivatives
- Save the final distortion profile for use
You need multiple images of a chessboard pattern from different angles and positions. The script capture_calibration_images.py helps you capture these images:
python capture_calibration_images.pyControls:
- Press
cto capture an image - Press
qor Escape to quit
The images will be saved in the calibration_images directory.
Process the calibration images to compute the camera matrix and distortion coefficients:
python camera_calibration.pyThe calibration results will be saved in the output directory:
calibration_data.pkl: Complete calibration data in pickle formatcamera_matrix.txt: Camera matrix in text formatdistortion_coefficients.txt: Distortion coefficients in text format- Undistorted versions of the calibration images (if enabled)
Apply the calibration to a live video feed:
python live_undistortion.pyControls:
- Press
dto toggle between distorted and undistorted view - Press
qto quit
All scripts use variables instead of command-line arguments for configuration. You can modify these variables at the top of each script:
CAMERA_ID = 0  # Camera ID (usually 0 for built-in webcam)
CHESSBOARD_SIZE = (9, 6)  # Number of inner corners per chessboard row and column
OUTPUT_DIRECTORY = 'calibration_images' # Directory to save calibration imagesCHESSBOARD_SIZE = (9, 6) # Number of inner corners per chessboard row and column
SQUARE_SIZE = 2.5 # Size of a square in centimeters
CALIBRATION_IMAGES_PATH = 'calibration_images/*.jpg' # Path to calibration images
OUTPUT_DIRECTORY = 'output' # Directory to save calibration results
SAVE_UNDISTORTED = True # Whether to save undistorted imagesCAMERA_ID = 0 # Camera ID (usually 0 for built-in webcam)
CALIBRATION_FILE = 'output/calibration_data.pkl' # Path to calibration data- Image Collection: Capture multiple images of a chessboard pattern from different angles
- Corner Detection: Detect the chessboard corners in each image
- Calibration: Use the detected corners to compute the camera matrix and distortion coefficients
- Undistortion: Apply the calibration to remove lens distortion from images
The camera model used is the pinhole camera model with radial and tangential distortion:
- Camera Matrix: A 3x3 matrix containing the focal lengths and optical centers
- Distortion Coefficients: A vector containing the radial and tangential distortion coefficients
After calibration, you can expect:
- Undistorted Images: Straight lines in the real world will appear straight in the images
- Accurate Measurements: You can measure distances and sizes in the real world from the images
- 3D Reconstruction: You can use the calibration for 3D reconstruction or augmented reality applications
- Chessboard Not Detected: Make sure the entire chessboard is visible in the image and well-lit
- Poor Calibration Results: Use more images from different angles and positions
- Camera Not Found: Check the CAMERA_ID parameter (usually 0 for built-in webcams)
This project is licensed under the MIT License - see the LICENSE file for details.
- OpenCV for providing the computer vision algorithms
- The OpenCV documentation for the camera calibration tutorial