
Workbench to animate cameras and objects, record and play videos

- Create animations of cameras and objects separately or simultaneously, showing the details of your project.
- Ability to create cameras/objects animations between two chosen points, making them follow a path or rotating them on a fixed base/axis.
- Camera targets can be free, fixed, or mobile with the option to make them follow the path together with the camera.
- Ability to re-edit animations and adjust positions, rotations, and zooming of the cameras.
- If you already have an animation in another workbench, you can add cameras animations and produce render videos with the connection module (see below more details).
- Ability to Play, pause, scrub forward and backward the cameras/objects animations in real time prior to recording.
- Create frames from the FreeCAD 3D view or the rendered ones.
- Create videos from them.
- Check the results playing the videos you have created.
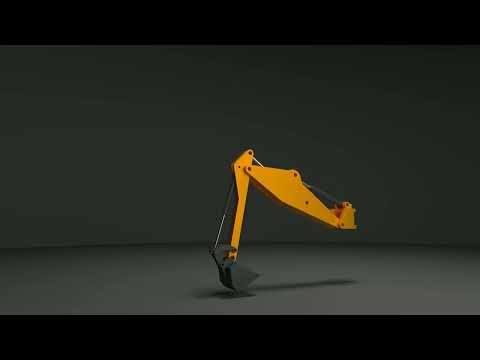
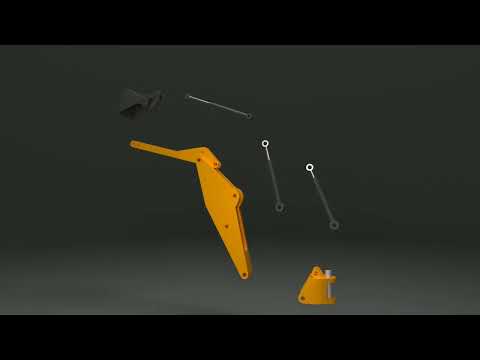
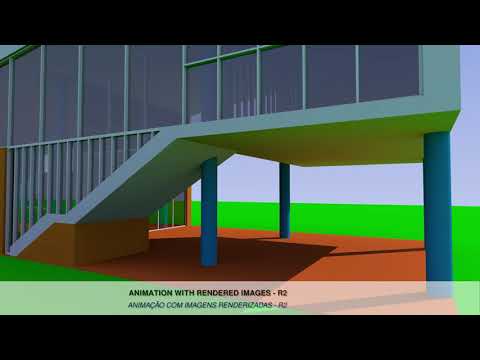


FreeCAD ≥ v0.20
- Go to Tools > Addon Manager
- Locate 'Movie Workbench' and install it
- Restart FreeCAD
Result: Reopening FreeCAD will now show Movie workbench available in the workbench selector dropdown.
Expand to read manual installation instructions
- Open FreeCAD and its Python console, and type the following into it:
import os
user_mod_path = os.path.join(FreeCAD.getUserAppDataDir(), 'Mod')
print(user_mod_path)- Click 'Code' button above and 'Download ZIP', then extract its contents as 'Movie' to the indicated Mod folder.
- Restart FreeCAD
- If you want to use the rendered frames, you must install the Render Workbench, prepare rendering projects and test them preventively to make sure everything is working correctly (see information in FreeCAD-Render). It is also recommended to take advantage and use some cameras from this workbench that better show the animation.
- If you want to use an animation from another workbench, script or macro of FreeCAD, it is necessary to prepare the connection module for using them (ex. Modified ExplodedAssembly). For this, see the instructions inside the MovieConnection.py.

The (new) Movie Workbench toolbars.

The MovieCameras and Objects menu.
- Click on the MovieCamera button
 to create one and to configure it (see the tips showed for each item in the property window - a Movie Camera properties image is shown below).


The MovieCamera properties.
- Initially, a static camera is created, Positions A and B are identical. You can use it like this in a object animation, as a fixed camera, adjusting the remaining settings as desired (rotation, zoom, steps, target, etc.).
- To set up the newly created MovieCamera to animations between two positions, select and activate the Movie Camera you want to configure with the Enable an object for animation button -
 (the MovieCamera icon will be marked as enabled -
 ). Position the 3D view with the desired framing to be the end of the animation (Pos B), then click on Set position B button -
 and save them by clicking Enable an object for animation again. You can also keep the position B that was initially created and modify only position A, or modify both. Use the controls on the animation toolbar to verify that the adjustments are as desired. Make fine-tuning adjustments if necessary in the position, rotation, and zoom of the Movie Camera (see Movie Camera properties image below) and save them by clicking Enable an object for animation once more.
- To make that the MovieCamera follows a route, you must create a segment first to do so. It can be a line, arc, circle, ellipse, B-spline or Bézier curve, from Sketcher or Draft Workbenches. Select the segment created in Cam_Route_Selection property. Configure the remaining camera properties.
- To adopt a sequence of cameras, enable the previous created MovieCamera, go to point B of this one then select it and click on the MovieCamera button . Establish the point B of the latter. Repeat this process until the last camera.
- The targets of the Movie Cameras can be adjusted to follow paths, fixed or mobile points or objects or living free to permit use of rotations angles, for example.
- To create animations of cameras and objects simultaneously, prepare one or more movie camera animations (according to the previous instructions) then create the objects animations (see instructions below) and include them in sequence in 'Group' property, the option 'Camera and objects' will be adjusted automatically. It is also possible to do the reverse: create the MovieObjects first, select those that will work in conjunction with a camera, and then click on the MovieCamera button .
- To apply animation from another workbench, you have to use one that the connection module be already prepared to communicate with, if so, select the workbench you want to work in Cam_3Connection property.
- To perform an animation, first select one or more MovieCameras -
 you want to animate , the sequence of Movie Cameras selected will be the one adopted for the animation. Run a round trip in the animation with the Move to the end -
 and Return to beginning -
 to reset all the steps of the animation in their initial positions. Then click on Play the animation button -
 . You can play backwards too - Play backward the animation button -
 . If a connection is previously configured and activated in the movie camera properties, objects related to this connection will be animated as well.
- Use the Return to beginning - , Take a step back -
 , Pause the animation -
 , Move one step forward -
 and Move to the end - buttons as needed. They will also work with the objects or workbench animations connected, if so.
- Important: after making adjustments to a MovieCamera, always save them using the Enable object for animation button.


- Select the objects you want to animate, click on the MovieObjects button -
 to create and to configure it (see the tips showed for each item in the property window - image below). These initial placements of the objects will be saved, and they can be rescue when you delete the movie objects with the Exclude a MovieObjects button -
 . At this moment, the MovieObjects will not be ready for animation, since points A and B are still the same.


The MovieObjects properties.
- To set up the MovieObjects for animations, first, select and activate the MovieObjects - you want to configure with the Enable an object for animation icon - . If you wish to change the initial position established when the MovieObjects were created, modify each object at the desired position and angles to be the start of the animation, click on Set the Position A button -
 . Now, position each object at the desired position and angles to be the end of the animation, then click on Set the Position B button - and save them by clicking Enable an object for animation again. You can also keep the position B that was initially created and modify only position A, or modify both. Note that the MoveObjects icon will be marked as enabled for animation -
 only when positions A and B are different. Use the controls on the animation toolbar to verify that the adjustments are as desired. Make fine-tuning adjustments if necessary in the positions and rotations of the objects (position A or B) and save them by clicking Enable an object for animation once more.
- To continue the sequence of animating the objects, enable the previous created MovieObjects, go to point B of this one then select it and click on the MovieObjects button - . Establish the point B of the latter. Repeat this process until the last MovieObjects.
- To make that the Movie Objects follows a route, you must create a segment first to do so. It can be a line, arc, circle, ellipse, B-spline or Bézier curve, from Sketcher or Draft Workbenches. Select the segment created in Objects_Route_Selection property. Configure the remaining object properties.
- To rotate a group of objects around a fixed axis, you have first create a MovieObjects - and set its Pos A and B ( and ), then select only those objects among the group that you want to rotate (first the objects, then the axis) and click on Rotation Axis button -
 . To erase these settings, select the corresponding MovieObjects, enable it, and go to the end of the animation (Move to the end - buttons), click on Set position B button - and again on Enable an object for animation icon - .
- If you want that the objects rotate around their centers of gravity, after create a MovieObjects and set its Pos A and B, habilitate the Objects_RotationCG property.
- You can animate a series of Movieobjects in a desire sequence by clicking on them -
 in the property window accordingly of that and enabling them (with the Enable an object for animation icon - ). The animation will perform the sequence created.
- To create animations of cameras and objects simultaneously, you have to prepare one or more MovieObjects first (according to the previous instructions), select them in the proper order and click on MovieCamera button - for a new camera, or include them in 'Group' of a existing MovieCamera property, the 'Camera and objects' option will be enabled automatically.
- To apply animation from another workbench, you have to use one that the connection module be already prepared to communicate with, if so, select the workbench you want to work in Cam_3Connection property.
- To perform an animation, first select one or more MovieObjects - (objects only) or MovieCameras - (camera and objects) you want to animate, the sequence of selection will be the one adopted for the animation. Run a round trip in the animation with the Move to the end - and Return to beginning of the animation - to reset all the steps of the animation in their initial positions. Then click on Play animation button - . You can play backwards too - Play backward the animation button - . The animation of connected workbenches objects only works when associated with a MovieCamera (see instructions for movie cameras animation above).
- Use the Return to beginning - , Take a step back - , Pause the animation - , Move one step forward - and Move to the end - buttons as needed.


The Movie Animation menu
- Select one or more MovieCameras - or MovieObjects - and click on Clapperboard button -
 to create a Clapperboard -
 (once a clapperboard is enabled, it will also display the corresponding icon.
 ), select its icon at the tree objects window to configure its properties (see the tips showed for each item). Execute a complete animation sequence, as previously mentioned.
- Click the Enable recording button -
 to open the new Recording settings task panel (see image below) and configure the frame and video properties.


The (new) 'Recording settings' task panel
- Choose 3D view for record 3D view frames or Render for record rendered ones, choose or confirm the folder to salve the frames.
- Start the recording with the Play animation button - or Play backward the animation button - .
- If You want only to stop recording, click on Stop recording button -
 .
- If you need to stop the animation, click on Pause the animation button - , it will also stop recording.
- After the animation finished, the video will play automatically if the option Play video is enabled.

- If you want to create the video from the frames, use the Record video button -
 , select the input frames folder and the output video one to save it.
- If you want to watch a video or re-watch the created one, click on play video button -
 and select the file.


The Movie Record and Play menu

The context menu
Working with A/B keyframes (cameras and objects) and paths:
- Positioning and saving cameras and/or objects
To use cameras, position the 3D view at the desired point and click MovieCamera (MC). This will create a static camera, as positions A and B are currently identical. To create a camera movement, reposition the 3D view to the next desired point and click Set position B.
If you wish to create a path through using sequential cameras, select the previous MovieCamera (which already has distinct key frames A and B) and click MovieCamera. This creates a new MovieCamera based on the previous one, with its A and B positions matching the predecessor's position B. Reposition the 3D view to the next desired point and click Set position B again. To continue the path through, repeat the process; for the final MovieCamera, specify its position B. After finishing and testing the path, delete the duplicate frames (the first frame of the copies).
If you want a single camera to follow a pre-established route, see item 2.
To set targets for the cameras, see also item 2.
For the animation of objects, position and rotate them according to the start of the animation (key position A), select them as a group, and click MovieObjects (MO). Reposition the objects (adjusting positions and/or rotations) and click Set position B. To continue animating the objects, select the previous MovieObjects (which already has the group of objects) and click MovieObjects. This creates a new MovieObjects based on the previous one, with its A and B positions matching the predecessor's position B. Reposition the objects (adjusting positions and/or rotations) and click Set position B. Repeat this process until the desired movement is complete. The animation of the set of objects will occur through a sequential process involving the predefined positions A and B.
-
Configure the properties of the MCs and MOs if necessary. To do this, select an MC or MO and:
2.1. Specify a previously created route in the corresponding property of the MC or MO.
2.2. Specify targets in the MC properties.
2.3. Specify rotations by axis or CGs in the MO properties.
2.4. After making changes, click Enable object for animation.
-
To create videos of the animations, include the MCs and MOs in Clapperboards. To do so, select the correspondent MCs and MOs and click on Clapperboard button.
-
Edition of any animation element:
4.1. Select the corresponding MC or MO and enable it (by clicking Enable object for animation).
4.2. After making the necessary changes to the MC or MO, save them by clicking Enable object for animation once more.
-
If you create more than one Clapperboard, to switch control between them, select the desired one and use the Enable object for animation button.
-
To end any animation process, click Disable object for animation.
-
To start the recording process, enable the desired Clapperboard and click Enable recording.
-
Configure the recording settings in the open task panel and click OK.
-
To start recording, use the animation buttons (forward or backward). You can also use the other animation tool controls to position the start of the animation at the desired step.
-
To stop the frame and video recording process, click Stop recording.
-
As mentioned, if you wish to (re)create the video from the frames, use the 'Record video' button.
-
If you wish to (re)watch the created video, click the 'Play video' button.
For more information, see the ADDITIONAL_INFORMATION.md (also inside the Movie folder, after the installation). Wiki documentation will be available as soon as possible.
For discussion, please use the Movie Workbench thread in the FreeCAD forum.
LGPL-2.1 LICENCE
Francisco Rosa